Hey guys, here’s a 2000-point Soulblight Gravelords list I’ve now used across two competitive events, including a recent tournament win. Everything in this article comes from direct table experience, not theorycrafting or second-hand research. This is how the list actually performs against competitive Age of Sigmar players when played correctly.
If you’re coming from Spearhead and looking to scale up to full Age of Sigmar, this list builds naturally on that foundation.
Soulblight Gravelords – 2000 Points
Battle Formation: Bacchanal of Blood
General’s Handbook: 2025–26
Drops: 3
Spell Lore: Lore of Undeath
Manifestation Lore: Manifestations of the Grave
Battle Tactic Cards: Attuned to Ghyran, Intercept and Recover
General’s Regiment
- Prince Vhordrai (470) – General
- Terrorgheist (220)
- Wight King (90)
Regiment 1
- Vampire Lord on Nightmare Steed (190)
- Shard of Night
- Immortal Ego
- Blood Knights (440) – Reinforced
Regiment 2
- Vampire Lord (140)
- Barrow Guard (300) – Reinforced
- Dire Wolves (150)
TL;DR – How This List Plays
This list wins by seizing the centre early, blocking movement with manifestations, and forcing opponents into bad charges. Barrow Guard and Wight King anchor the middle, Blood Knights and Prince Vhordrai punish overextension, and Dire Wolves control tempo and battle tactics. If played patiently, the list snowballs hard from turn 2 onward.
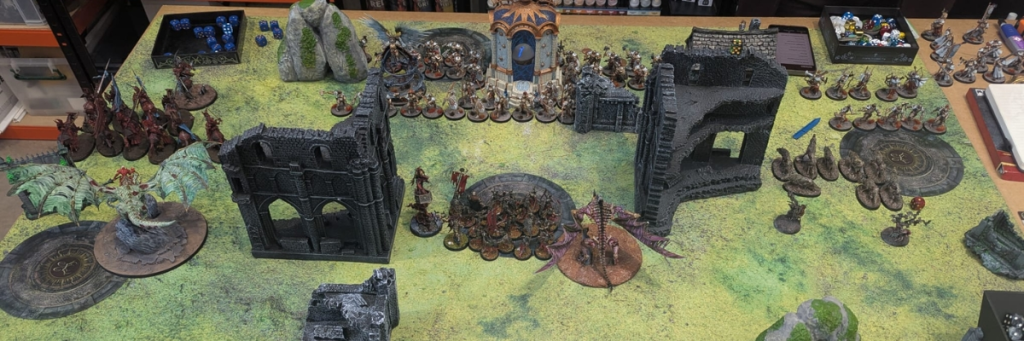
Deployment Priorities and Early Positioning
This list lives or dies on early positioning, so deployment matters more than people expect. Your Barrow Guard, Wight King, and Vampire Lord (Infantry Hero) should be deployed with the clear intention of contesting the centre immediately. They are your anvil, and most of your early battle tactics and board control depend on them surviving and holding ground.
The Terrorgheist should be positioned slightly behind or to the side of this central block, close enough to support when needed but never exposed early. Think of it as a reactive threat rather than an opening punch.
Blood Knights and Prince Vhordrai should start just behind your front line, using manifestations as a forward screen rather than committing too early. This positioning allows you to punish overextension while keeping your most valuable damage dealers safe until the right moment.
Finally, Dire Wolves should be deployed wide. Their role is flexibility: threatening flanks, objectives, or backfield heroes depending on how your opponent sets up. If Dire Wolves are forced into predictable lanes, you’re losing one of the list’s biggest tempo tools before the game even begins.
How to play this 2000 points Soulblight Gravelords
The main thing when playing this list is you are trying your hardest to cause major havoc on the sides whilst seizing the centre as fast as possible. Many players will advise you against rushing forwards, I think however it’s a great decision under the right circumstances. In nearly all situations, rushing forward in the centre is going to be fine (If you go against Ogre Mawtribes this may be the exception).
How to use Magic in this Soulblight Gravelords list
In turn one we are focused heavily on summoning manifestations, as we are likely going to go first its best to use your magic on manifestations rather then trying to hurt the opponents who are likely out of range. Tip: you can summon manifestations from the range of your “cursed sepulchres” which means you have incredible board placement on your manifestations.
This list wins games by controlling space before it controls damage. Manifestations are not just spells here, they are movement denial tools.
In your opponents turn one I highly advise you to use your Vampire Lord on foot to cast prison of grief on your opponent which will likely be within 12″ of you in the centre, this will ensure you get to attack first in the centre and do some significant damage before your opponent. Remember +1 to cast rolls for vampires not in combat, so this will be -1 for casting in your opponents hero phase but +1 due to vampire casting. So still goes off on a 7+. This will greatly improve your likelihood of surviving in the centre of the board.
Turn 2: this is dependant on the flow of the game, hows it going? Do you need to do damage or do you need to do more strike lasts? Do you need to prevent damage? I recommend in turn 2 using Vhordrai’s Quick Blood spell (strike first) this will set you ahead hugely (remember it lasts until the start of your next turn).
How to use the Barrow Guard and Wight King
Barrow Guards, Wight King and Vampire Lord run to take the centre and achieve the first battle tactic: “Attuned to Ghyran”. If there’s space, make sure the Terrogheist is following up next to them to support when needed. The Barrow Guard are not expendable here. Their job is to hold the centre, survive, and grind, not to chase kills. Think of them as your Anvil, let your opponent hammer against them to no avail.
The Barrow Guard are possibly one of the sneakiest units in the Soulblight Gravelords army, they look like disposable skeletons that most opponents expect to remove easily… However you would be wrong! When paring these undead skeletons with a Wight king or a soulblight infantry hero on foot they gain 5+ ward save, this makes them super tanky and when paired with the Wight King you can do some pretty insane damage.
Pick a friendly Deathrattle Infantry unit within combat range after this model has fought. That unit can fight immediately and gains +1 to hit rolls for those attacks.
Using your Wight King to go first with combat attacks will ensure that your Barrow Guard attacks are now hitting on 2+ and wounding on 3+. Along with Crit Mortals this is pretty insane. Let’s add all the attacks together: 20 Barrow guard = 41 attacks with Crit Mortals +1 rend. Then your Wight King also has 5 attacks with Crit Mortals 2 damage each. This is a absolutely unholy amount of damage which will be extremely hard to prevent without ward saves. In the competitions against the Stormcast player my Barrow Guard slew 3 different units and still didnt die thanks to “Deathly Invocation” and Rally rolls.
If you manage to get your manifestations: Bats and Hand of Nagash out in front of your Blood Knights then go ahead and try to summon the “Unholy Reliquary” which you can use to either add additional attacks to your hero (Self banishes the manifestation) or heal your heroes should they get into trouble, I typically use the self banish extra attack so I can summon it again next turn.
I typically have the Vampire Lord with this unit as backup just in case the opponent hard targets the Wight King and we lose the 5+ ward save, the Vampire Lord can step in and also bestow that +5 ward save as she is also an infantry hero of Soulblight Gravelords, so keep her within 3 inches of Barrow Guard. This is the same principle that makes certain Spearheads dominate the mid-board.

How to use Vampire Lord (Infantry Hero)
You’ll notice that we selected the “intercept and recover” battle tactic, this is important because our Vampire Lord on foot is going to be one of our “debt collectors” haha! She has a unique ability which allows her to teleport on a 3+ anywhere on the board more than 3 inches from enemy heroes and more than 9 inches from enemy units. This means that once your opponent has moved forward and left their heroes at the back (which typically they leave holding the treasures). In turn 2 we will use that teleport ability to get behind the heroes and try to recover those treasures. Along with the Dire Wolves you can really trap some enemy heroes and get all 3 treasures back.
Remember Vampire Lord on foot is Anti Hero, which means she does rend 2 on attacks against Heroes. The way I like to play in turn 2 is to summon a unholy reliquary within 12 inches of her and use it to gain the extra attack. I then all out attack her and that brings her profile to: 6 attacks, hitting on 2+ wounding on 2+ (thanks to “Aristocracy of the Night”), additionally she has Crit 2 hits which will just elevate the amount of attacks even more. Then she does 2 damage per hit, this is a potential of: 12 damage without any crit 2 hits being accounted for, if everything gets through. In the game against the Stormcast player I used her to take out 2 heroes with the Direwolves supporting her. That’s a guaranteed 15 points from treasures!
How to use the Direwolves Unit
Direwolves: with this unit I always try to identify a gap in my opponents forces where I can easily get through and potentially damage a Hero holding a treasure (Intercept and Recover). Think of these Direwolves as units that are just trying to waste your opponents time and force them to make awkward decisions, waste valuable resources dealing with our wolves.
With Direwolves with Run and Charge, Dire Wolves threaten up to 28 inches of movement in a single turn (Run + Charge combined). This reach lets them waste your opponent’s time, resources, and positioning far beyond their points cost.
The way I would typical use them is either as a blocking device to prevent units getting to another of my units or prevent objective grabbing. If you use your Direwolves as kamikaze wolves where their job is to do damage and waste opponents time before they die you can really gain an huge advantage. (remember we can resurrect half of these wolves). Direwolves currently cost 150 points, your job is to make your opponent waste points dealing with them, the more mayhem you cause the better the fight in the middle will go.
Using Endless Legion in the following movement phase will allow these Direwolves to come back at half strength (5 models). If they do not die then you can use this unit to retreat and cause further mayhem, even if you survive with 1 direwolf you can really make an impact. Simply take that wolf within 12 inches of a hero and use “Deathly Invocation” to raise 1 wolf and then use rally to raise more wolves, this can quickly bring back most of the unit.
How to use Blood Knights and Vampire Lord on Steed
Due to having only 3 drops, in most scenarios you will be able to go first. I personally like to take the first turn and use my full movement characteristic where appropriate. Whether I use my full movement on the Blood Knights comes down to my luck at summoning manifestations. Thanks to the below Aristocracy of the Night we will get +1 to casting rolls and this will hopefully allow us to get our manifestations up.
Vampires gain +1 to casting rolls while not in combat, and +1 to wound rolls on the charge. This passive is doing a huge amount of work in this list and should be played around at all times.
My goal with Manifestations is to create a wall in front of my Blood Knights and Vampire Lord. This will mean if my opponent moves up and attempts to charge at me, they will be mostly blocked by manifestations which will absorb all of their attacks and likely mean we will get to charge them on the next turn (Important). If your opponent decides to stay back in their turn, then we can move our manifestations and use them to further pin opponents down and take board control. Either decision is a win-win situation.
In most instances I experienced opponents who charged my manifestations and attempted to pile in towards my Blood Knights, in most situations they failed to get within combat range due to the good blocking of my manifestations.
Manifestations blocking, I use both the bats and the hand of Nagash to do the blocking in turn one, they both have crit mortals and can attack before they die. If you are going to select which to attack with first, I recommend the bats: They have less health but 20 attacks in total with crit mortals, this can be some nice damage before they die.
Blood Knights will then charge in the following turn and slay their opponents in likely one big attack. Remember if you charged them next to their Vampire Lord on Steed you gain +1 rend, if you are against Infantry you gain an additional +1 rend to a total of +3 rend. Your attacks are 3 attacks each hitting on 3s (All out attack) so hitting on 2+ and wounding on 2+ (thanks to “Aristocracy of the Night”) and doing charge +1 damage. In total this is a potential of 92 damage points with your horses (horses roll badly so likely closer towards 62 potential damage). The goal isn’t to trade Blood Knights, it’s to delete one key piece, gain Saint of Slaughter, and let the snowball start.
Once you win that fight and slay your opponent with your Blood Knights, you will gain a buff (Saint of Slaughter) from Vhordrai (who is parked conveniently directly behind the Blood Knights) I recommend choosing +1 damage. This will mean in attacks where you are charged at, you still have 2 damage but when you charge opponents you will have 3 damage thanks to charge +1 damage, this is insane. Remember to rally your Blood Knights, this can save you the game.
How to use Prince Vhordrai
The way I used Prince Vhordrai in the past absolutely failed and it failed because I relied on him too much as a centre piece to build my army around. He has a high wound count but that doesnt mean throw him into situations willynilly, you’ll just repeat my errors and often get him killed before he can do much. Instead the way I now like to play him is as a supporting hero initially who then breaks ranks to dive in and do damage on the back lines. Think of Prince Vhordrai as a closer, not an opener.
I like to place Prince Vhordrai directly behind my Blood Knights when moving up the board, this is so that when the Blood Knights slay something I can buff them at the end of the turn using Prince Vhordrai’s ability “Saint of Slaughter”.
End of turn: Pick a Vampire unit wholly within 12″ that destroyed an enemy unit this turn. That unit gains one permanent buff:
• +1 Damage
• +2″ Move
• +1 Attack characteristic
Units can gain multiple different buffs, but the same buff cannot be chosen twice.
Once the Blood Knights slay a unit or hero or anything really, you can buff them using that ability and then it is time for Prince Vhordrai to go to work. Fly keyword allows you to pass over terrain (just be careful of his base size) – fly him towards your enemies and get stuck in, your Blood Knights will have access to the rest of the board now and will likely be able to clean up any stragglers without support. In turn 2 hero phase use your quick blood ability to gain strike first.
How to use the Soulblight Gravelord Terrogheist
This monster is perfect for supporting your infantry in the centre, with a decent sized base of 130mm you can sit slightly behind or to the sides your infantry and wait for the perfect time to strike! Then when you charge you can use your rampage ability to get “Strike First” which will hugely help keep the centre and prevent you units dying.
Seizing the centre isn’t easy, we have to use every trick in our Soulblight Gravelords book to make it happen, this monster is used as support to your infantry not as a solo piece, as a solo piece it will often die having achieved very little.
When This List Wins Games
This list wins games by seizing the centre early, then using layered buffs to create a snowball effect that becomes harder to stop each turn. Manifestations, Barrow Guard, and Dire Wolves force awkward charges and inefficient trades, while Blood Knights and Prince Vhordrai punish any overcommitment with overwhelming damage. Once Saint of Slaughter and other buffs begin stacking, opponents are often forced into bad charges just to stay in the game, which is where this list consistently pulls ahead.
Common Mistakes With This List
The most common mistake with this list is overcommitting Prince Vhordrai too early. Due to his high health its easy to think he is a solo missile or a centrepiece you build the entire game around but often this will just get him slain in turn 1. He is a force multiplier that becomes devastating once buffs are stacked and the board state has collapsed in your favour.
Another frequent error is charging Blood Knights before manifestations have done their job. If manifestations aren’t forcing awkward movement, blocked charges, or wasted activations, then Blood Knights are being thrown into fair fights instead of winning ones.
Finally, many players undervalue Dire Wolves. Their job isn’t to survive or trade efficiently, it’s to waste your opponent’s time and force bad decisions. If Dire Wolves aren’t pulling units out of position, blocking movement, or threatening battle tactics, they’re not being used to their full potential.
What is this Soulblight Gravelords List Weak Against?
This army may struggle significantly against heavy monster armies and Ogres. This is because monsters are tanky enough to get stuck in, do a lot of damage with their rampage abilities before combat even starts.
These matchups are difficult, but not unwinnable if you deny charges, control space, and force them to play your game.
Ogors are a problem for this army because of the impact hits caused from charge, this would greatly hurt this army and prevent the avalanche effect of seizing the centre. If I were playing against Ogres, I would move up very slightly and try my hardest to prevent them the opportunity to charge me. They do so much damage on the charge impact hits that it honestly cripples your army. Best to play it slow, block with manifestations and then counter charge in your turn. This will be less of a “fun” game but it will likely allow you to win as you’re countering their biggest strength, just don’t expect to get much done with “Attuned to Ghyran”.
Where I Get My Warhammer Models
If you’re looking to build this list yourself, these are places I personally use for models, paints, and hobby supplies. Prices change often, so it’s always worth checking.
Note: These links may be affiliate links. If you buy through them, BattleClash may earn a small commission at no extra cost to you.