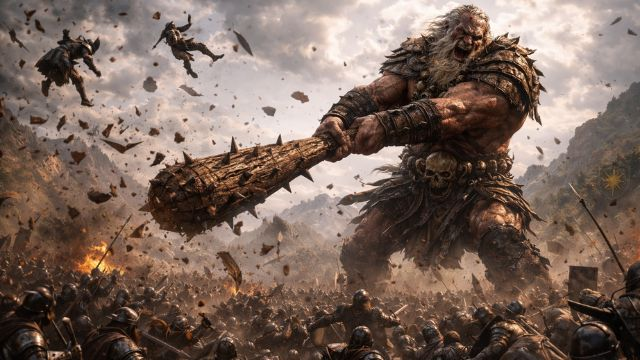
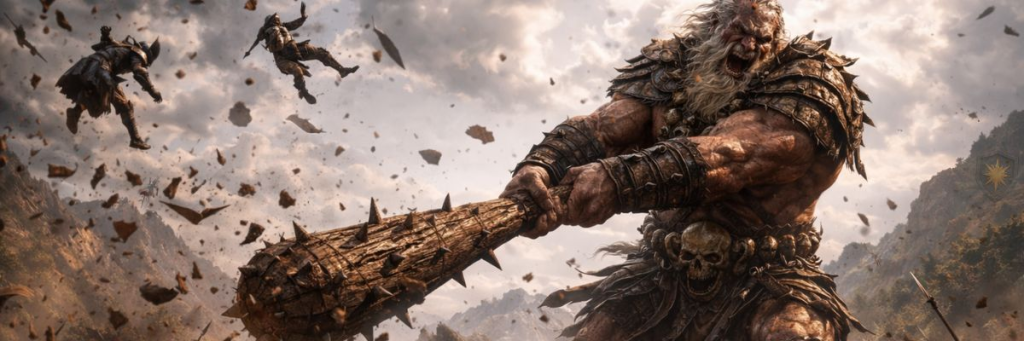
If there’s one Spearhead that completely rejects the usual rules of Age of Sigmar, it’s the Sons of Behemat – Wall Smasher Stomp. This army doesn’t rely on layered buffs, clever tricks, or overwhelming numbers. Instead, it places three enormous monsters on the table and forces the opponent to solve a very simple but very uncomfortable problem.
Can you deal with three Gargants before they take over the board?
On paper, Wall Smasher Stomp looks almost too basic to be competitive. In practice, it’s a brutally efficient Spearhead that dominates objectives, controls combat order, and punishes mistakes hard. It’s not quite oppressive enough to sit in S Tier, but it firmly earns its place as a high A Tier Spearhead when played well.
Battle Traits: Control Before Damage
Wall Smasher Stomp’s Battle Traits focus on control and survivability rather than raw output, which fits the army perfectly.
Bellowing Roar
Any Combat Phase
On a 2+, an enemy unit in combat with a Mancrusher Gargant suffers -1 to hit for that phase.
This is deceptively powerful. Against elite or hard-hitting units, reducing hit rolls often decides the combat outright. It keeps your Gargants alive longer, forces inefficient trades, and makes committing into them far riskier than it first appears.
‘Grab Those Rocks and Chuck ’Em!’
Your Hero Phase
Your general can command another friendly Mancrusher within 12″ to gain +1 attack with Throwin’ Rocks for the turn.
This isn’t about big damage spikes. It’s about softening targets, finishing weakened units, and applying pressure before charges happen. On smaller Spearhead boards, even light ranged damage adds up quickly.
Regiment Abilities: Control or Sustain
Wall Smasher Stomp offers two strong regiment choices, both of which lean into what Gargants already do well.
Earth-Shaking Charge
Once per phase (Army), Any Charge Phase
After a Gargant charges, roll a dice for each enemy unit in combat with it. On a 3+, that unit fights Strike-last.
This is usually the correct choice. Strike-last is one of the strongest mechanics in Spearhead, and with such a low model count, controlling activation order is vital. Earth-Shaking Charge allows you to engage multiple units safely and removes much of the risk normally associated with aggressive charges.
Foe-Chompers
Passive
Each time an enemy model is slain by Stuff ’Em In Me Bag, the Gargant heals D3 wounds.
Foe-Chompers shines against elite armies and multi-wound units, turning successful Bag rolls into both damage and sustain. It’s strong, but generally less consistent than Earth-Shaking Charge, especially into armies with many small units.
Enhancements: What Actually Works
Monstrously Tough
The default pick. Increasing your general’s Health from 12 to 15 makes them extremely difficult to remove and massively improves objective bullying. Opponents are often forced to overcommit just to bring one Gargant down.
Lanky Git
Rolling 3D6 for charges instead of 2D6 gives Wall Smasher Stomp unexpected reach. This is excellent for early pressure and catching opponents who misjudge distances.
Furiously Territorial
Adding +1 to hit when attacking enemies contesting objectives you don’t control is a strong mid-game option. It rewards proactive play and makes objective flips far more reliable.
Extra-Big Bag
High risk, high reward. Being able to target two enemy units with Stuff ’Em In Me Bag can be devastating into elite armies, but it’s far less reliable into MSU lists. Powerful, but matchup dependent.
The Mancrusher Gargant: Simple and Oppressive
Every unit in Wall Smasher Stomp is a Mancrusher Gargant, and that consistency is a strength.
Each Gargant brings:
- Move 8″
- Control 10
- Health 12 (15 on the general with Monstrously Tough)
Their 5+ save is largely irrelevant. What matters is how much effort it takes to remove them and how much space they control while doing so.
In melee, Gargants are extremely reliable. All their attack profiles wound on a 2+, which means damage output is consistent rather than spiky. Throwin’ Rocks provides light ranged pressure, mainly used to soften targets or finish off weakened units holding objectives.
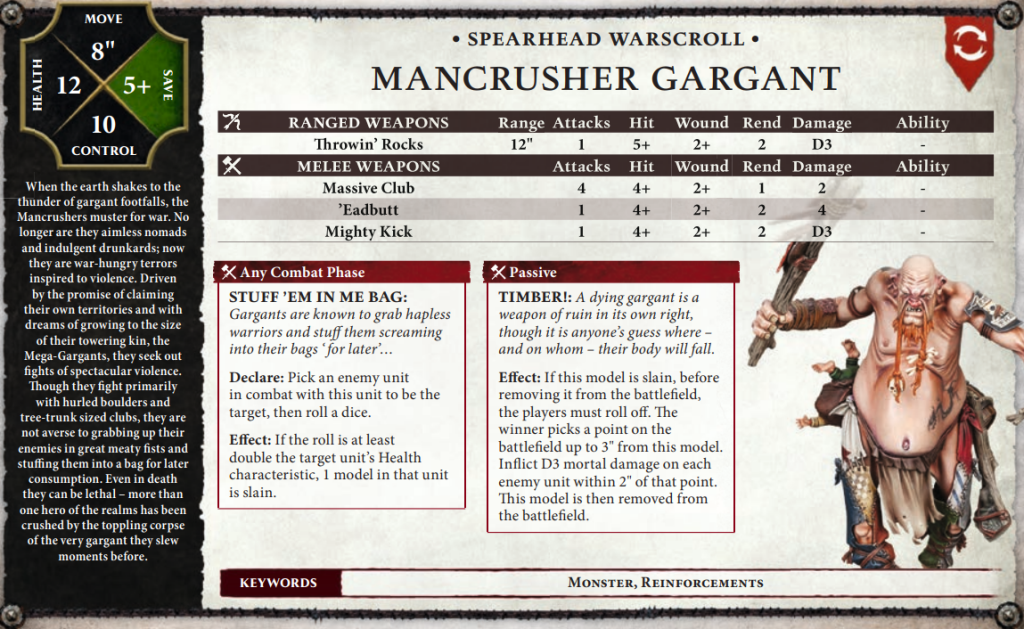
Stuff ’Em In Me Bag and Timber! Threat Even in Death
Stuff ’Em In Me Bag is one of the most dangerous abilities in Spearhead. If the roll is at least double the target unit’s Health characteristic, a model is instantly slain. This makes elite infantry and key models incredibly risky to commit into Gargants, regardless of saves or defensive rules.
Even when a Gargant dies, Timber! ensures they leave an impact. The chance to deal mortal damage on death punishes opponents for crowding objectives and often creates value even in defeat.
Playing Wall Smasher Stomp: Strategy and Fun
Wall Smasher Stomp is more strategic than it first appears. While the army is simple, it rewards patience, positioning, and good objective timing.
You want to:
- Establish early board presence
- Force opponents into awkward engagements
- Use Strike-last to control key combats
Despite the low model count, every decision matters. Turns are fast, impactful, and extremely satisfying to play.
Lessons Learned After Games
The biggest lesson is restraint.
Charging just because you can often gives opponents opportunities they wouldn’t otherwise have. Wall Smasher Stomp wins by forcing bad decisions, not by rushing combat unnecessarily.
Positioning also matters more than expected. Poor placement can give up objectives or waste the threat of Timber! entirely.
Don’t be scared to get stuck in with your general, when playing on the “Sand and Bone” Spearhead you can always fish for the “Final Breath” battle tactic to bring your general back. Don’t play so cautiously that your opponent can get full board control.
Your two “non general” gargants are quite disposable as they are reinforced, so using them early to take out key targets is absolutely key especially as the risk is worth the reward if you’re coming right back. Just be careful to avoid risks when you return to the board.
Common Mistakes to Avoid
- Overextending a single Gargant away from support
- Forgetting to use Abilities such as: “Stuff Em in a Bag”, “Bellowing Roar” and “Earth Shaking Charge!”
- Ignoring objectives in favour of chasing kills
- Forgetting how powerful Strike-last can be
- Underestimating how much control values decide games
Turn 1 vs Turn 2: Making the Right Call
Turn One
Apply pressure without fully committing. Take space, threaten objectives, and force your opponent to react.
Turn Two
Often the stronger choice. Let your opponent move first, then punish overextensions with charges and Strike-last control.
Wall Smasher Stomp is comfortable going first or second, which is a major strength.
Why Wall Smasher Stomp Is A Tier
- Massive objective control on every model
- Reliable damage with very little variance
- Strong combat sequencing through Strike-last
- Simple to play, but still rewards experience
What keeps it out of S Tier is its lack of redundancy and limited answers to extreme shooting or mobility-heavy lists. In the right hands, though, it remains a terrifying Spearhead to face.
Where Wall Smasher Stomp Sits in the Spearhead Tier List
Based on multiple games and consistent performance, Sons of Behemat – Wall Smasher Stomp earns a clear A Tier placement. It punishes mistakes brutally, dominates objectives by default, and remains a strong, reliable choice across many matchups.
It may not completely warp the format, but it demands respect every time it hits the table.